How to create a POUpdated 6 months ago
How to create a PO for our Receiving Team
If you are shipping Nice Commerce new product or replenishing existing product use the below steps.
NOTE:
- We require 1 PO per shipment
- Please only include information relevant to the single shipment. If more than 1 shipment is expected, please add the corresponding amount of POs
Step 1
In Ship Hero, select 'All Purchase Orders' from the Purchase Order dropdown.
Step 2
In the top right corner, select 'Create A Purchase Order' or 'Upload Purchase Order'

Step 2A
If uploading a PO (best for large POs or multiple shipments) a PO upload template should be provided in your Shared Drive. If this is missing or you would like a new template, please reach out to your Account Manager.
This template will ask for 4 columns to be completed. 
1. We require 1x PO per shipment. If you are adding information for 1x PO, the same PO number should be listed in Column A. If you are adding 2 different POs in the same file, you would have 2 different PO numbers listed by each shipment
2. Vendor; make sure all the products you are adding to the PO have their vendor listed. You can check this by going to the product in ShipHero and reviewing the vendor/s listed
Once the CSV has been completed, go to your ShipHero > Purchase Orders > All Purchase Orders. Select "Upload PO"
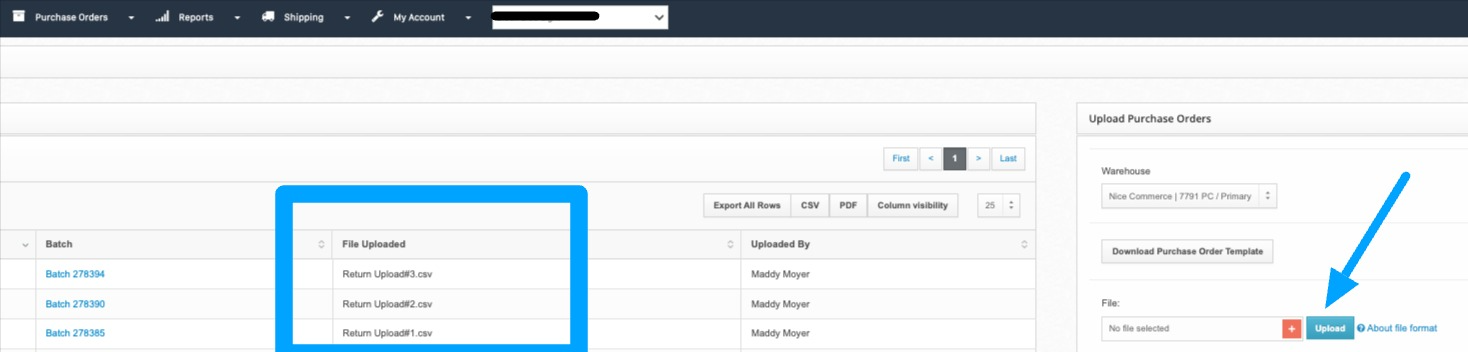
Each CSV file that you upload will create a Batch. In the Batch, you will see the PO/s created based on the PO Numbers you listed in the file. Please remember to go into the created POs within the batch or via All Purchase Orders to list tracking information, the expected arrival date, attach a packing slip, leave notes, etc.
All inbound shipments require appointments and to comply with our Receiving Standards.
If you have any questions about the upload process, please reach out to your Account Manager
Step 3
Under the Vendor Tab, Select "ALL"
- Please be mindful that the product you will list in this PO needs to have "All" or the vendor of your choosing selected
Under the Warehouse Tab, Select 'Nice Commerce | 7791 PC - Primary'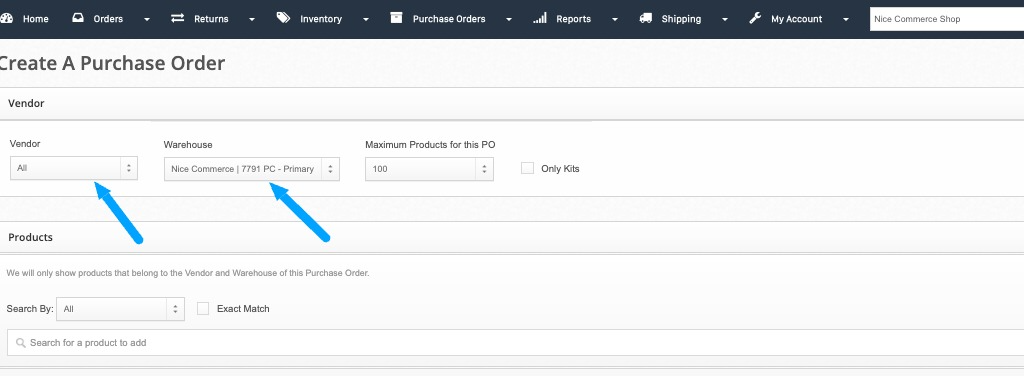
Step 4
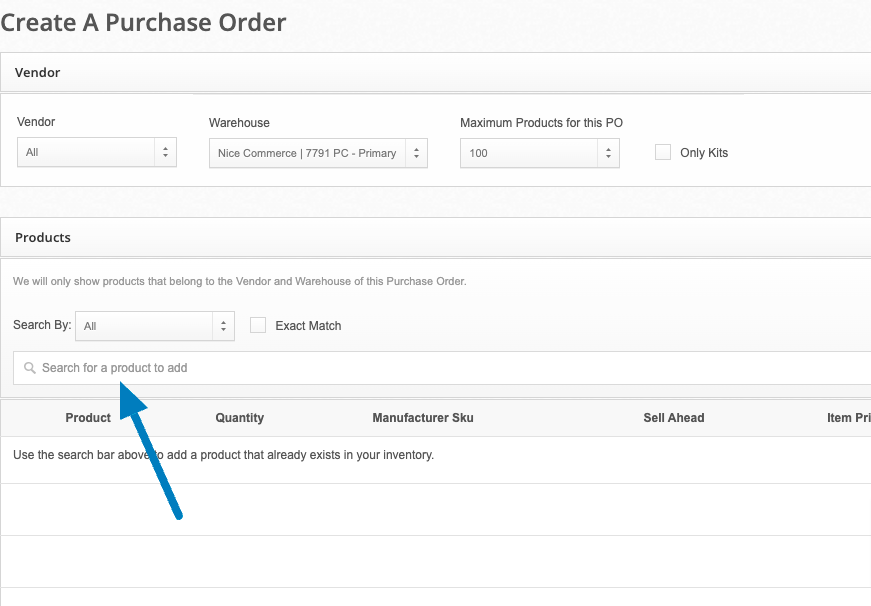
Add the SKUs and quantities to the PO
You can search for products by their SKU or a component of their naming, Example: Typing in "Sticker" to see a list of all your stickers in stock. I can then find the exact Sticker I want to add to the PO
Step 5
Hit Save Order.
Step 6
Go to the PO and adjust the expected arrival date, add the tracking number, and feel free to add notes for our receiving department.
If multiple pieces are expected, please add that to the notes:
